From time to time brakes must be bled to provide consistent performance. What steps you need to go to bleed your Magura MT5, MT7, etc., you read in this article.
For bleeding you need the following tools:
- Magura bleeding kit. Alternatively, two syringes go (one requires a hole, which you can drill yourself)
- Connection adapter for the brake caliper
- The Magura transport locks
- Royal Blood mineral oil
- Allen key
- Torx 25
- 8mm open end wrench
Magura MT bleeding and filling
After the tools are prepared, loosen the clamps of the brake lever with a Torx 25 and fix it in a horizontal position so that the bleed screw is the highest point of the system. If you have a pressure point adjustment turn it back to the starting position. To prevent the brake pads from getting oily, disassemble the brake caliper with a Torx or Allen wrench. Now loosen the mounting screws of the pads and remove them. Pull out the brake pads and put them aside. Push back the brake pistons and insert the transport lock. Otherwise, the brake pistons could be pushed out during bleeding. To prevent the transport locks from falling out, reinsert the retaining screws.

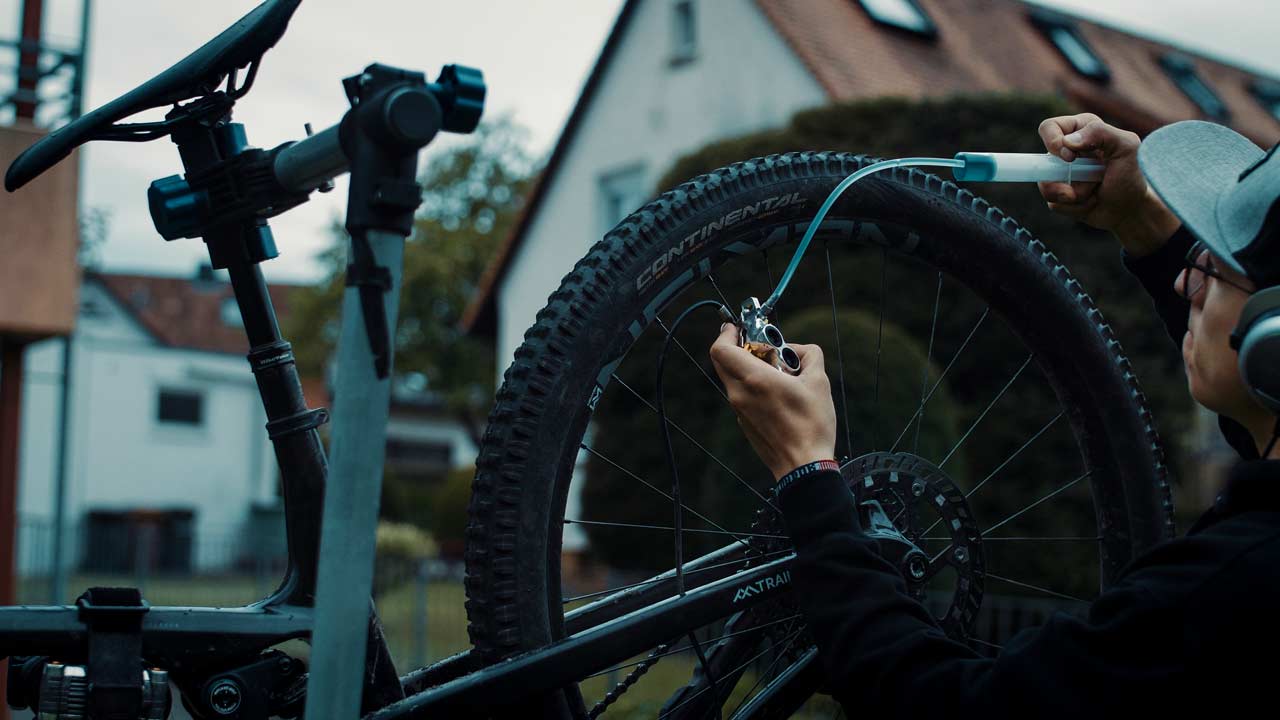
After the preparations have been made, you can draw the brake fluid into the syringe without a hole. Now open the brake system. To do this, hold the brake caliper higher than the brake lever so that no mineral oil escapes, and loosen the screw with a Torx 25. Now screw on the prepared syringe with the connection adapter and tighten with an 8mm open-end wrench. Now you can leave the caliper hanging and move on to the brake lever. First, pull the syringe plunger over the hole. Now loosen and remove the screw on the brake lever and insert the syringe. Now the actual bleeding or filling process begins. To do this, lift the brake caliper vertically and press mineral oil into the system with the syringe. The upper syringe is now flooded with escaping mineral oil. Now pull the oil back almost completely with the lower syringe. Repeat this process until no more air bubbles escape. To get the last air bubbles out, pull the brake lever 2-3 times and release it abruptly. Now pull and squeeze the brake fluid from syringe to syringe one or two more times. Your Magura brake should now be bled.
Before you remove the upper syringe, block the hole with your finger so that the mineral oil remains in the syringe. In order to put the syringe aside, press the air out of the syringe until the piston is under the hole. Now screw the bleed screw back in to the brake lever and tighten it very lightly. The syringe on the brake caliper is also removed. To do this, hold the brake caliper higher than the brake handle so that no mineral oil escapes and reinsert the screw. Insert the brake pads and secure them with the screws. Now install the caliper without completely tightening it and perform a pressure point check. The brake pistons still have to move to their original position, so it may be that you first reach into the void. If everything works well, adjust the brake lever and caliper and you can ride happily away.